A wrecking ball does not care where things land. When a building comes down, the mess can bury your timeline and budget. Without a plan, you face safety risks and surprise costs. A solid demolition waste management guide puts you back in charge. You will learn to handle debris with purpose, not panic. This keeps your site clean and your crew safe.
This guide walks you through every step of the process. You will master construction debris disposal from start to finish. Learn smart waste removal strategies that save time and money. Discover how to sort materials for recycling and handle dangerous items the right way. By the end, you will run a tighter, cleaner job from first swing to final sweep.
Assessing the Demolition Site
Walk the site before any wall comes down. Look at what the building is made of. Wood, drywall, concrete, and metal all need different handling. Note how much debris you expect. This helps you plan bin sizes and truck loads. Check for things like paint or old pipes that need special care. A good look now prevents big problems later.
Spot materials you can sell or recycle. Copper wiring, steel beams, and clean wood have value. Mark items that need careful handling. Things like old light bulbs or asbestos tiles are dangerous. A solid step-by-step demolition waste management guide starts here. You figure out construction debris disposal before it piles up. This early work makes hazardous waste handling much easier when the demo starts. You save time and keep everyone safe.
Gathering Tools and Safety Equipment
Get your gear ready before the demo starts. You need thick gloves, hard hats, and dust masks for everyone. Safety glasses keep dust out of the eyes. Have strong bags and bins on site. Dumpsters should be placed where trucks can reach them, while also keeping in mind proper dumpster waste limits. Labels help workers sort things fast. Good tools make the job smoother and safer.
Safety rules matter most with dangerous debris. Train your crew on hazardous waste handling before they start. Show them what to watch for. Have a plan for spills or accidents. When all tools are ready, work flows better. You will not stop to find the missing gear. This helps waste removal strategies work as planned. Your site cleanup procedures start strong when prep work is done right.
Segregating Waste Materials
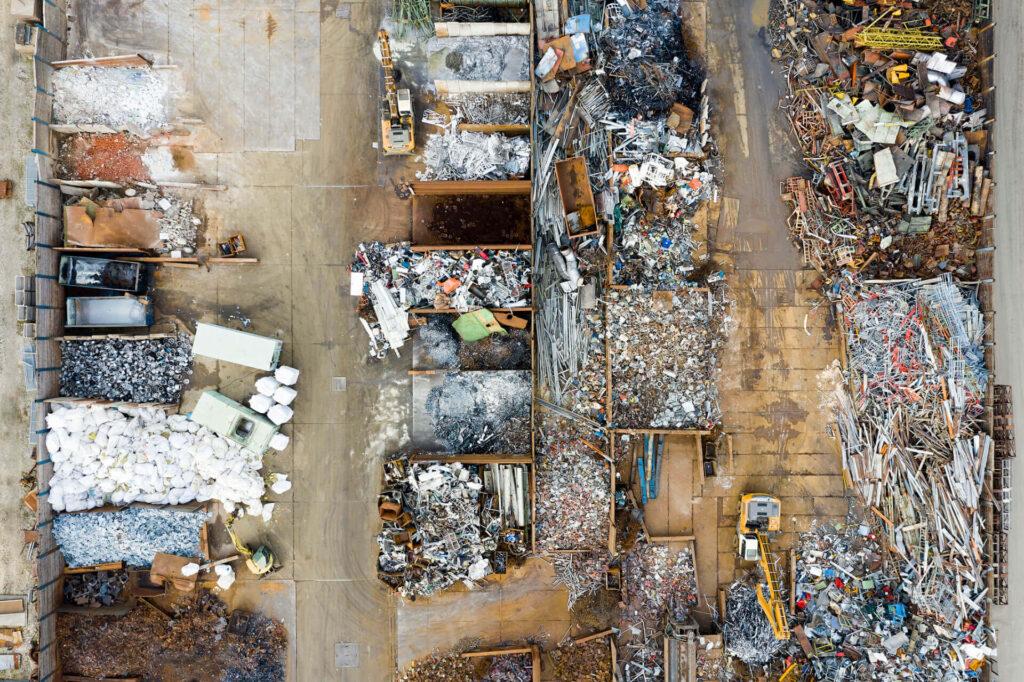
Sorting debris at the source saves time and money. You keep valuable materials out of the landfill. Workers know exactly where each item goes. This makes the whole job run more smoothly.
Wood:
Pull out clean lumber and plywood. These can become mulch or new products. Nails and paint stay in the trash.
Metal:
Gather pipes, wires, and beams. Scrap yards pay cash for these. Keep steel and copper separate.
Concrete:
Pile brick and concrete in one spot. This gets crushed for the road base later. Keep dirt out.
Hazardous items:
Set aside paint tanks and old lights. These need special handlers. Never mix with regular trash.
Cardboard and paper:
Flatten boxes as you go. Keep them dry for recycling. Stack in a clean area.
Mixed waste:
One bin for everything else. This goes to the landfill. Keep it as small as you can.
Label each bin with big, clear signs. Workers should see from far away what goes where, helping them follow proper commercial waste rules. This makes recycling demolition materials much easier. You build an efficient Demolition waste management system with this guide. Good sorting means less construction debris disposal cost at the end.
Efficient Collection and Transport
Moving debris well keeps your site running fast. You want waste gone before it piles up. Good transport saves backs and time. Here is how to do it right.
- Use dumpsters placed smartly: Put bins where fill happens most. Workers walk less and toss more. This keeps debris from spreading around the site.
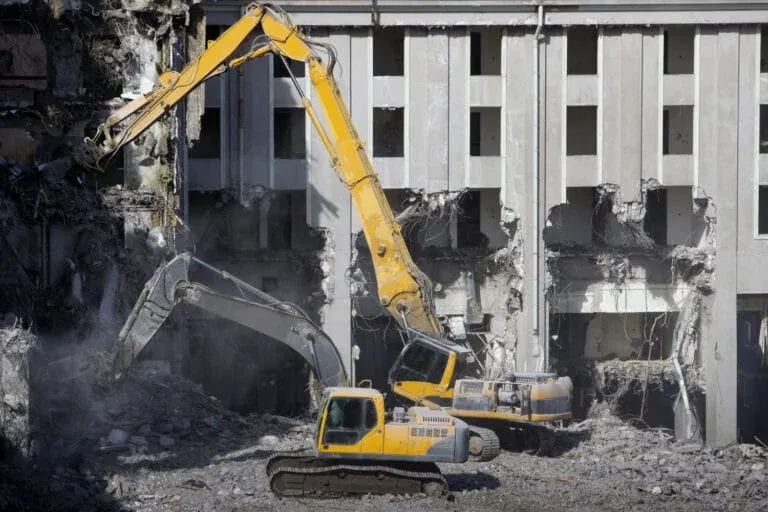
- Bring in mechanized gear: Loaders and skid steers move heavy loads fast. They lift concrete and steel that hurt workers. Machines do the hard work for you.
- Set a pickup schedule: Call haulers before bins fill up. Regular pickups stop trash from piling high. Your site stays clean and safe each day.
- Use dollies and carts: These roll heavy items to the pile. Workers save energy for real demo work. Good wheels make all the difference.
- Keep paths clear: Mark routes where trucks drive. Debris should never block these lanes. You need flow for quick removal.
- Sort before you haul: Take mixed loads to the right place. One trip to recycling and one to the landfill. This cuts fuel cost and time.
These waste removal strategies keep work moving. Follow the step-by-step demolition waste management guide for best results. Good transport makes site cleanup procedures quick and easy. Your crew stays happy when trash does not pile up.
Recycling and Reusing Materials

Look at your sorted piles with fresh eyes. Metal beams and wires go to scrap yards for cash. Clean wood becomes mulch or new lumber. Concrete gets crushed for road base and fill. Even some plastics find new life. These materials should never see a landfill. You make money and help the planet at the same time.
The benefits go beyond good feelings. Less trash means lower dump fees. Selling scrap puts cash back in your pocket. Reusing items on site saves buying new stuff. You also meet the green building rules that some jobs require. Smart recycling demolition materials builds your reputation, too. Clients like contractors who waste less. An efficient Demolition waste management guide includes recycling at every step. You cut construction debris disposal costs way down when you send less to the dump.
Handling Hazardous Waste
Some demolition items can hurt people or the land. You must treat these with extra care. Things like old paint, asbestos, and chemicals need special steps. Never mix them with regular debris. Set them aside in a safe spot away from workers. Mark the area so everyone knows to stay back, and keep separate plans for safe disposal like yard waste removal for non-hazardous materials.
Use strong sealed containers that will not leak. Put clear labels on everything you set aside. Tell your whole crew what these labels mean. Store these items in a dry place until a specialist comes. They have the training to take them away. Good hazardous waste handling keeps your site legal. It is part of smart waste removal strategies that protect your business. Following a step-by-step Demolition waste management guide means you never cut corners with dangerous stuff. Your workers stay safe, and you stay out of trouble.
Site Cleanup Procedures
The big demo work is done, but you are not finished yet. A clean site shows you care about quality work. It also gets you ready for what comes next.
Sweep all surfaces:
Push dirt and small bits into piles. Use brooms and dustpans for tight spots. A clean floor lets you see what is left.
Control dust and dirt:
Spray water on dry areas before sweeping. This keeps dust from flying around. Use misters on very dry days.
Pull out remaining nails:
Walk every inch of the site. Bend or remove sharp things sticking up. This stops tire punctures and foot injuries.
Break down scrap piles:
Sort anything left after the main job. Send the last loads to the right places. One final haul closes the job right.
Check for hidden waste:
Look under dirt and behind walls. Sometimes small piles get missed. Find them before you call it done.
Walk a final site check:
Bring your checklist and look hard. Note any spots that need more work. Make sure it is clean and safe.
Take after photos:
Snap pictures of the clean site. These prove your work to clients later. Good records help with final payment.
These site cleanup procedures finish the job strong. An efficient Demolition waste management guide ends with a spotless site. You mastered construction debris disposal from start to finish. Now the next crew can start their work right away.
Documentation and Record Keeping
Write down what you threw away and where it went. Note the weight of metal, wood, and concrete. Keep papers from recycling centers and landfills. These records show you did the job right. They also help you plan better next time.
Good notes protect you from problems later. Inspectors might ask how you handled dangerous items. Your logs prove you followed the rules. Clients feel sure you managed their job well. You can show them exactly where the debris went. This builds trust and keeps work coming.

Your records also make future jobs easier. Look back at old logs to guess waste amounts. You will order the right bin sizes from the start. Follow your step-by-step Demolition waste management guide and write it all down. Smart waste removal strategies include good paperwork. And careful hazardous waste handling always gets documented. This habit saves headaches down the road.
Final Checks Before Disposal
Do not call the last haul truck yet. Walk the whole site one more time. A final look catches things you might have missed.
- Look behind piles and under dirt. Small bits hide in plain sight. Find them before you lock the gate.
- Make sure all dangerous items are sealed. Confirm labels are still on containers. Nothing should leak or sit open.
- Peek into each bin and stack. Make sure wood is not mixed with metal. Check that the concrete does not have trash in it.
- Dirt and trash ruin good materials. Pull out anything that does not belong. Clean loads get accepted at recycling yards.
- Match what you have to your notes. This helps when you get bills later. Good records start with correct numbers.
- Ask if they saw anything odd. Sometimes workers notice things you did not. Use their eyes to double-check.
- Snap pictures of clean, sorted piles. These prove your work to clients later. They also help with your own records, especially when working with professional teams like Junk People LLC.
These steps finish your demolition waste management guide the right way. Good site cleanup procedures end with a solid walkthrough. And proper recycling demolition materials get one last look before trucks roll.
FAQS
Sort materials early, recycle what you can, and crush concrete on site. This cuts hauling costs and landfill waste.
Show them the sorting steps during morning meetings. Post clear signs near bins. Check their work and answer questions.
Loaders move heavy waste fast. Dollies roll smaller items. Good bins with labels keep sorting smoothly and easy.
Yes, trained specialists handle dangerous items safely. They use proper methods that protect the ground and water from harm.
Keep good records of where waste goes. Follow local rules and train your crew. Save all disposal papers for proof.