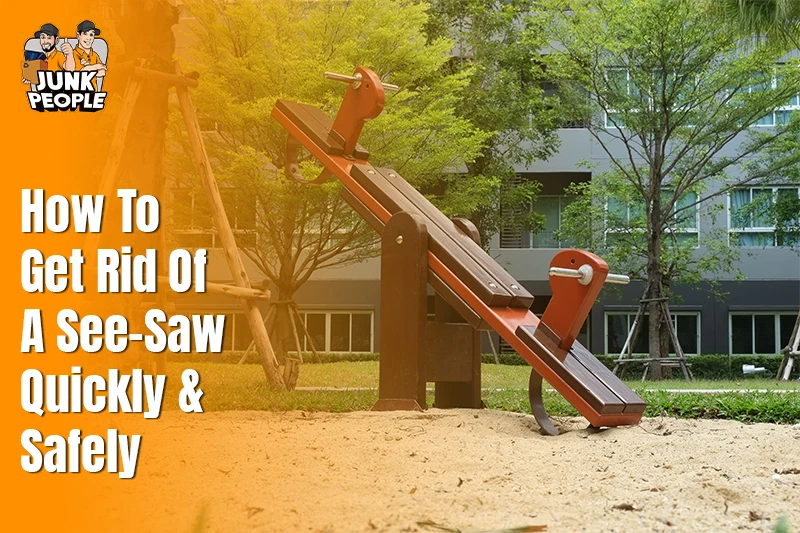
Many homeowners always give priority to designing an entertaining playground with joyful equipment, which can be more entertaining for their children. But with the passage of time see-saw makes these joyful equipment worse for them. It makes the equipment rusty, unstable, and worn out, which can convert into a serious safety risk.
Sea-sae removal is not just about clearing space but also about improving the backyard appearance, protecting the family, and preventing avoidable injuries.
Most people think that old play equipment is harmless and unused, and they fail to remove it. But unfortunately, it can be the reason of accident due to the sharp edges and loose bolts, or weakened support structures.
In this guide, you will learn how to remove an old see-saw step by step by using safe dismantling techniques and proper tool safety tips. By the end, you will know how to dismantle a see-saw safely and efficiently, helping you get rid of a swing without damaging your yard or risking injury.
Why Removing an Old See-Saw Matters
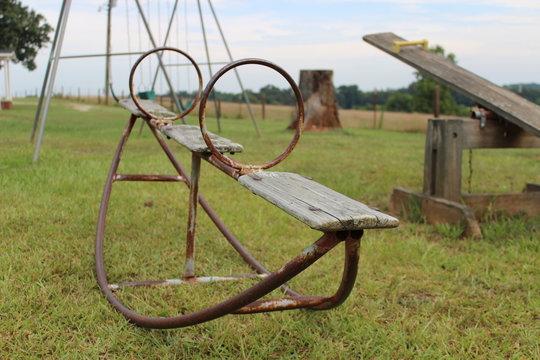
The hidden dangers in the backyard can occur due to the old see-saw, which can be exposed to outdoor exposure causes metals to rust, wood to crack, and bolts to loosen. Multiple issues can be a risk of a big collapse due to the sharp edges that can lead to serious injuries.
As per modern safety standards, from a playground equipment safety perspective, outdated or damaged playsets no longer meet requirements. Children, always looking for entertainment, may climb on them out of curiosity, while adults can trip over exposed parts during routine yard work. This makes removing large outdoor items like a see-saw an urgent task rather than a cosmetic choice, along with planning smart ways to manage debris safely and responsibly.
Beyond safety, removing an old see-saw instantly improves your backyard’s appeal. It helps to create space for new landscaping, modern outdoor playset removal, or even a relaxing seating area. With the learning the safest and fastest ways for see-saw removal ensures that you can complete the task without stress, unnecessary damage, or medical risks.
1. Inspect the See-Saw Before Removal
First of all, it’s very important to know the see-saw before you begin dismantling anything, as it helps you understand the condition of the see-saw and make the plans for potential hazards during removal.
Check for Hazards
Begin by examining the entire structure closely. When you check the rusted bolts. Check the loosened, cracked wooden planks, bent metal beams, and sharp edges caused by breakage. It’s a must to give special attention to the central pivot point, as this area often bears the most wear and tear.
A see-saw can be partly buried when it has been in the same place in the ground. If these issues are identified early, it can be helpful to prevent injuries during removal and to plan the safest dismantling approach.

Safety First
Safety always counted as the priority. You can save yourself with the use of proper safety measure so it’s a must to follow the guidelines as per the safety standards. To save you eyes from flying debris, rust flakes, or dust, you can wear the safety googles.
Similarly, to minimize the risk of cuts and scrapes, by utilizing the long sleeves, sturdy shoes, and protective clothing helps. Meanwhile, it’s very important to keep children and pets far away from the work area. See-saw removal involves heavy lifting and exposed hardware that can be unsafe for anyone which are not directly involved in the task.
2. Gather the Right Tools for the Job
When it’s about collecting the correct tools, it helps to make the see-saw removal faster, safer, and far less frustrating. It’s very important to choose the right tool; if it’s not, as per careful consideration, it can lead to stripped bolts, damaged parts, or personal injury.
Essential Tools
The tools are the most important thing that support the secure dismantling guide approach and also minimize the options of accident with th reason of excessive force. Loosen nuts and bolts holding the structure together by using a set of wrenches and socket tools.
For removing the seats, handles, and smaller fixtures, screwdrivers are the essential tool. A rubber mallet can gently loosen the stubborn joints without damaging components. A pry bar is a useful tool to detach the tightly fitted parts or lifting beams during dismantling.
Optional Safety Gear
Safety gear is the additional part but not mandatory to make the process easy and comfortable. By using the work gloves it help to improve the grip and protect against sharp edges. Eye protection helps to prevents debris from entering your eyes. If you’ll be working close to the ground for extended periods the knee pads are helpful.
Using proper tool safety tips to make sure the backyard equipment removal is completed smoothly and with minimal risk.
3. Step-by-Step See-Saw Dismantling
The Break down of the process into steps that makes dismantling a see-saw safe and manageable. Avoid rushing, as sudden movements or falling parts that can cause injuries.
Remove the Seats and Handles
At the start, remove the seats and handles from each end of the see-saw. Use the appropriate wrench or screwdriver to loosen bolts slowly. Gentle tapping with a hammer or applying penetrating oil helps release rusted hardware. Place all removed hardware into an organized container. Separate metal pieces for easy recycling later and keep nails or screws contained, since unmanaged yard waste damages property and creates tripping hazards.
Detach the Central Beam
The central beam is usually the heaviest part of the structure. During removing it, use the controlled leverage and never stand directly to beneath it. Slowly loosen the pivot mechanism while supporting the beam to prevent sudden drops.
If the beam is especially heavy, ask for help. Team lifting reduces strain and prevents back injuries. This step is critical for anyone learning how to disassemble playground equipment safely.
Remove the Support Posts
A Remove the support posts weather it is for fence or in a building its is a serious structural changes needs the professional engineering systems that helps to help prevent collapse. It often anchored into concrete or deeply buried soil.
Dig carefully around the base to expose bolts or footings. For stubborn bolts, cutting tools may be essentials, but always cut slowly and with protective gear.
Once freed, gently lift the posts out of the ground. Avoid jerking motions, as sudden releases can cause falls or injuries.
4. Handling Large Parts Safely

For the large playground components needs the special care during removal and transport. The improper handling is a common cause of injuries during backyard cleanup.
Lifting and Carrying Tips
Always lift using your legs, not your back. Keep the load close to your body and avoid twisting while carrying heavy parts. For the long beams team lifting is strongly recommended to avoid the unexpected conditions.
Take breaks as needed because fatigue may increase the risk of accidents, especially when removing large outdoor items like playground equipment.
Transport and Disposal
Once dismantling is completed, transport the parts with careful consideration. Metal components can often be taken to recycling centers, while wooden pieces may go to designated landfill areas. After assessing all parts, if the see-saw is still in decent condition, consider donating usable pieces to community projects or DIY builds. When handling feels overwhelming, professional junk removal helps ensure safe, responsible disposal.
Responsible disposal is a key part of backyard equipment removal and it helps to keep your environment clean and safe.
5. Clean Up and Prevent Future Hazards
After the see-saw removal, a thorough cleanup make sure that your backyard remains safe and ready for future use.
Remove Debris and Sharp Objects
After carefully inspection of the area for leftover nails, screws, broken wood, or metal fragments. These all small items are easy to overlook but it can be a reason of injuries later. Dispose of damaged materials properly and double-check the soil surface.
This step plays a crucial role in preventing injuries during removal and afterward.
Prepare Area for New Equipment
Once the area is clear the next step is to level the ground and fill any holes that are left by support posts. This creates a safer surface for walking, playing, or installing new equipment.
If you have a plan to add a new playset, ensure it meets current playground safety standards. Proper spacing, stable ground, and age-appropriate designs reduce future risks.
Conclusion
Its not just about the removing an old see-saw. It’s more than a cleanup task, it’s an important step toward retaining the playground equipment safety and maximizing your backyard’s usability.
By following a structured and safe dismantling guide, using the right tools, and completing the see-saw removal quickly and efficiently, the process stays smooth from start to finish. Proper handling of large parts and responsible material disposal are key steps. Junk People LLC ensures every stage is managed carefully for safe, efficient, and stress-free removal.
Follow this guide to remove your see-saw safely and efficiently. Contact us today for expert tips or help with professional backyard equipment removal.
FAQs
Basic tools include wrenches, socket sets, screwdrivers, a hammer or rubber mallet, and a pry bar. These tools help dismantle a see-saw safely without damaging parts.
Wear protective gear, follow tool safety tips, lift properly, and keep children and pets away from the work area.
Small see-saws may be manageable alone, but larger or anchored structures require assistance for safe dismantling.
Metal parts can be recycled, while damaged wood should be taken to a landfill. Some parts may be reusable or donatable.
Most see-saw removal projects take between one and three hours, depending on size, condition, and anchoring.