
A hoarded home can make simple cleaning feel impossible. Rooms may have blocked paths and hidden hazards. Belongings can cover floors and important surfaces. The work also carries strong emotional weight. Learning how to clean a hoarder house starts with planning. It also requires safe sorting and careful removal. The goal is not just an empty room. The goal is a safer and usable home.
How to clean a hoarder house depends on the property condition. Some homes need basic clutter removal and deep cleaning. Others may involve pests, mold, or damaged materials. A structured plan keeps the work clear and manageable. This guide covers assessment, sorting, and disposal. It also covers cleaning and odor control, and restoration. Each stage helps reduce stress and avoid repeated work.
Start by Understanding What Makes Hoarder Cleanup Different

Hoarder house cleaning is not the same as routine cleaning. Severe clutter can affect movement and sanitation. It can also hide leaks and damaged floors. Pests can live inside stored materials. Large piles may block exits or cover electrical areas. Moisture can remain hidden for long periods. Bulky items may also require separate handling, especially when hot tub disposal is needed as part of clearing an overcrowded property.
Hoarding cleanup works best when removal follows a clear plan. Rushing can scatter waste across cleared areas. It can also cause important items to disappear. Workers may handle the same objects several times. A planned approach limits confusion.
Assess the Home Before You Start Removing Anything
Start with a walkthrough before moving large piles. Look for unstable stacks and damaged floors. Watch for leaks and electrical concerns. Note spoiled food and animal waste. Look for mold and pest activity. Professional hoarder cleanup services may be appropriate when the property has serious hazards, extensive clutter, or conditions that make DIY removal unsafe.
Take photos and notes during the walkthrough. They help track progress.
Identify Immediate Hazards That Can Stop DIY Cleanup
Stop DIY work when the property appears unsafe. Major mold or contamination may need trained help. Structural damage can make floors or ceilings unsafe. Active infestations may require pest control first. Blocked exits also raise risk.
Decide How Much Cleanup the Property Actually Needs
One cluttered room may support gradual cleanup. A whole house may need more labor. Large waste volumes need disposal planning. Match the cleanup plan to the property condition.
Gather the Right Supplies Before Cleanup Begins
Prepare supplies before sorting starts. Use heavy-duty gloves and eye protection. Choose suitable masks or respirators for the conditions. Keep sturdy bags and storage containers nearby. Basic hand tools can support safe removal.
Keep suitable cleaning products ready for later stages. Disinfectants may be needed after waste removal. Ordinary household products may not suit contaminated spaces. Preparing supplies early reduces unnecessary stops.
Seven Practical Methods That Make Hoarding Cleanup Easier
Work in Small Zones
Choose one small area and finish it first. Small zones make progress easier to see.
Create Clear Sorting Categories
Use simple categories for every item. Separate keep, donate, and trash. Add recycling where it fits. Use one review box for uncertain items.
Clear Safety Areas Before Cosmetic Areas
Open exits and main walkways first. Clear access to essential rooms. Safe movement matters before appearance.
Protect Valuables and Important Records
Set aside identification and legal papers. Protect financial records and family photos. Use a secure review area.
Use Designated Staging Areas
Move sorted belongings into planned zones. Keep donations away from disposal items.
Finish Removal Before Deep Cleaning
Remove waste and unwanted items first. Exposed surfaces are easier to clean. This prevents repeated work.
Clean From High Surfaces Downward
Start with upper surfaces and fixtures. Continue with walls and baseboards. Finish with floors.
Sort Belongings Without Creating More Stress
Sorting can become the hardest part. Work in small batches. Use consistent categories across every room. Damaged items may require disposal.
Avoid random disposal when the homeowner is involved.
Separate Important and Sentimental Items First
Create a secure place for photographs and identification. Add legal papers and financial records. Include jewelry and other valuables. Review these items before anything leaves the property.
Build Simple Categories for Faster Cleanup Decisions
Use the same categories throughout the project. Repeated rules reduce debate. A review group can hold uncertain belongings.
Remove Household Trash and Unwanted Items Safely
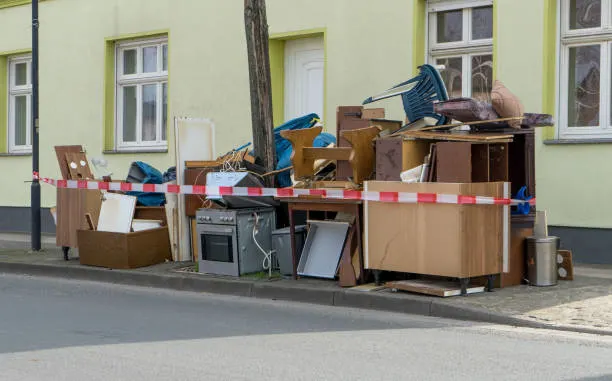
Clutter removal begins after sorting is stable. Bag household trash in strong bags. Keep walkways open during every trip. Plan disposal before waste leaves each room. Large volumes can quickly fill outside areas. Without a plan, the clutter only changes location. Separate ordinary waste from materials needing special handling. Bulky belongings may also require old furniture hauling when large pieces cannot be safely moved with ordinary household trash.
Plan disposal before waste leaves each room. Large volumes can quickly fill outside areas. Without a plan, the clutter only changes location. Separate ordinary waste from materials needing special handling.
Know Which Materials Need Special Disposal Handling
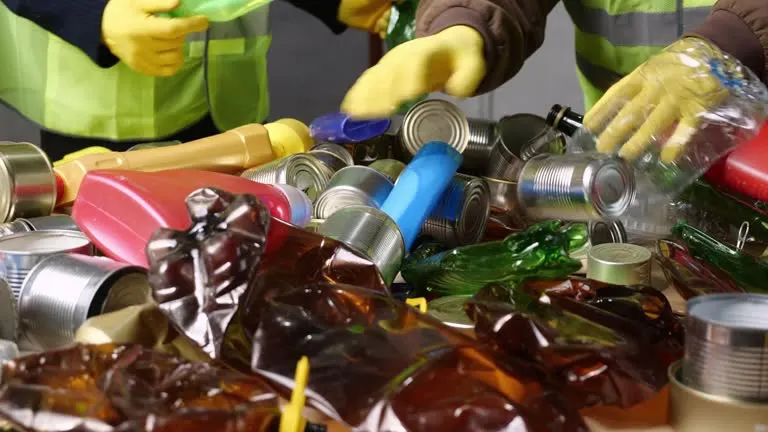
Not every item belongs in household trash. Medications and batteries may need separate disposal. Paint and chemicals also require suitable local channels. Electronics can need different handling. Sharps should never enter loose trash bags. Check local disposal options before removal day. Keep questionable materials separate until their handling is clear. For larger unwanted furnishings, furniture disposal services can help manage removal when items are too large or numerous for normal disposal.
Check local disposal options before removal day. Keep questionable materials separate until their handling is clear. This protects workers and prevents unsafe mixing.
Deep Clean Every Surface After the Clutter Is Gone
Deep cleaning hoarded homes should follow major removal. Start with ceilings and upper fixtures. Continue with walls and windows. Then clean shelves and other surfaces. Finish with baseboards and floors.
Use ventilation when conditions allow it. HEPA filtration can help manage fine particles. Choose products that fit each surface. Long-term buildup can leave grime and residue. Disinfection may be needed where contamination occurred.
Handle Odors, Mold, and Pest Problems Correctly
Strong odors may remain after clutter removal. Sources can include spoiled food or urine. Animal waste can also linger. Moisture may affect walls or flooring.
Fragrance only masks the problem. Odor removal starts with the source.
Remove the Source Before Trying to Control Odors
Remove spoiled items and contaminated materials first. Address moisture before treating affected areas. Clean or replace damaged surfaces when needed.
Recognize When Mold or Pest Treatment Needs Experts
Large mold areas can exceed normal cleaning. Hidden moisture can make treatment harder. Active infestations may require trained pest control. Seek specialist help when contamination is extensive.
Five Benefits of Using a Structured Cleanup Approach
A planned cleanup supports both safety and progress. It also gives each person clear priorities.
- Reduces physical and mental overwhelm by limiting the active work area.
- Makes sorting decisions more consistent across rooms and belongings.
- Improves safety as exits and walkways become easier to use.
- Prevents repeated cleaning by separating removal from deep cleaning.
- Creates a clear path toward regular home maintenance after recovery.
Structure does not remove every challenge.
Know When Professional Hoarding Cleanup Makes Sense
Professional help makes sense when hazards exceed normal cleaning skills. Severe clutter can require more labor and equipment. Biohazards or major mold need careful handling. Structural concerns can also change the plan.
Hoarding cleanup services may provide trained workers and protective equipment. They can coordinate removal and disposal.
Compare DIY Cleanup With Specialized Professional Support
DIY cleanup may suit smaller and safer areas. Professional support fits larger or contaminated properties. Key differences involve labor and equipment and hazard handling.
Ask the Right Questions Before Hiring a Cleanup Company
Ask about hoarding cleanup experience. Review safety procedures and disposal practices. Request a clear work scope. Check insurance and estimate details.
Understand How Long a Hoarder House Cleanup Can Take
There is no fixed cleanup timeline. Home size affects the work. Clutter volume matters even more. The number of workers also changes the pace. Sorting decisions can slow progress. Disposal needs can add more time.
Contamination may require separate treatment. Repairs can extend the project further. Deep cleaning may continue after clutter removal. Emotional decisions can also affect each stage. A realistic schedule should reflect the property itself.
Restore Damaged Areas After the Main Cleanup
Restoration starts after clutter and contamination are removed. Inspect flooring and drywall for damage. Check insulation and cabinets. Review fixtures and painted surfaces. Some materials can be cleaned. Others may need replacement.
Do not repair over active contamination. Cleaning comes before restoration. Replacement makes sense when a material cannot be safely restored. The final goal is a functional and usable property.
Build a Maintenance Routine to Keep the Home Livable
A major cleanup does not prevent future accumulation. Simple routines can protect cleared spaces. Remove trash each day. Return saved items to designated storage. Review clutter each week. Handle larger sorting tasks each month. Outdoor accumulation should also be addressed regularly, and yard debris cleanup can help keep cleared properties from developing new piles of branches, leaves, and other outdoor waste.
Keep storage limits realistic. Avoid filling newly cleared rooms with extra containers. Family members or caregivers can support simple routines. Property managers may also help where appropriate. Early action keeps small buildup from becoming another large project.
Protect the Person and Property Throughout Cleanup
Hoarding cleanup affects more than the room. The person involved may feel fear or loss. Avoid shame and harsh criticism. Do not remove personal property without proper involvement. Respectful communication can reduce conflict.
Protect private records during sorting. Keep valuables secure. Avoid damaging walls or floors during removal. The goal is a safer home. It is not simply an empty property.
Final Thoughts on Cleaning a Hoarder House Safely
Learning how to clean a hoarder house requires more than removing clutter. Start with a safety assessment. Then sort belongings with clear categories. Remove waste before deep cleaning. Junk People LLC can assist with organized cleanout services when the volume or condition of the property becomes difficult to manage. Address odors and contamination at their source. Restore damaged materials only after cleaning is complete.
Every property needs its own cleanup plan. DIY work may suit smaller and safer situations. Complex homes can require professional help. A structured process reduces missed hazards and repeated work. It also protects important belongings and usable spaces. Choose the safest next step for the property condition. Safe progress matters throughout cleanup. Professional support can safely complete work beyond normal household cleaning. Contact a qualified cleanup provider when the project exceeds normal household cleaning.
Frequently Asked Questions About Hoarder House Cleaning
Begin with a careful safety check. Look for blocked exits, unstable piles, mold, pests, leaks, sharp objects, and other hazards before moving anything.
Clear exits, hallways, stairs, kitchens, and bathrooms first. These areas improve safe movement, reduce immediate risks, and make later cleanup easier.
Sort belongings into keep, donate, recycle, sell, and trash groups. Set valuables, documents, and sentimental items aside for careful review before disposal.
Professional help may be needed when there is heavy contamination, major mold, pest infestation, structural damage, blocked exits, or overwhelming clutter.
Remove the odor source first. Dispose of spoiled or contaminated materials, fix moisture problems, then clean affected surfaces with suitable products.